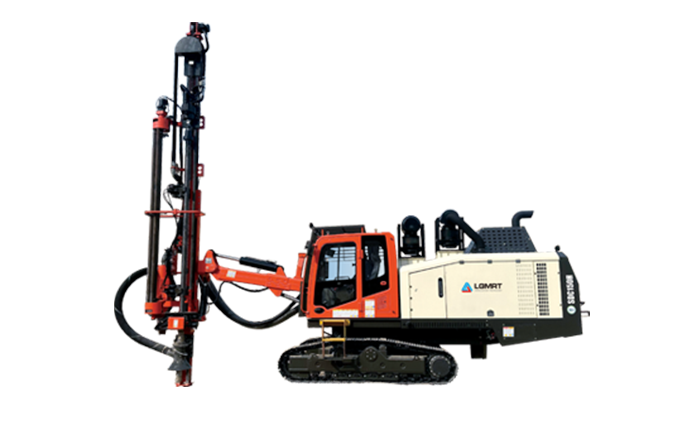
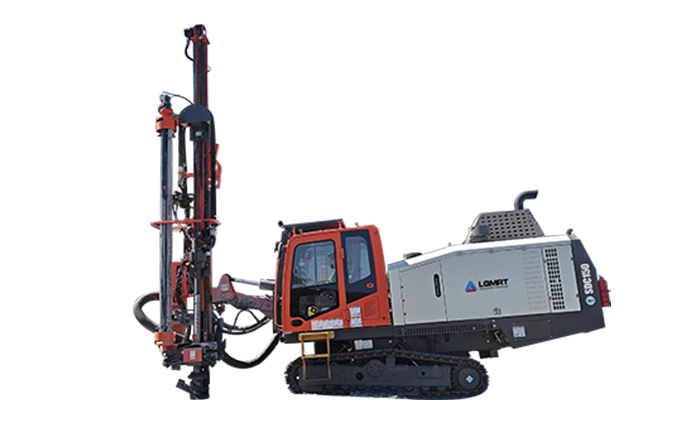
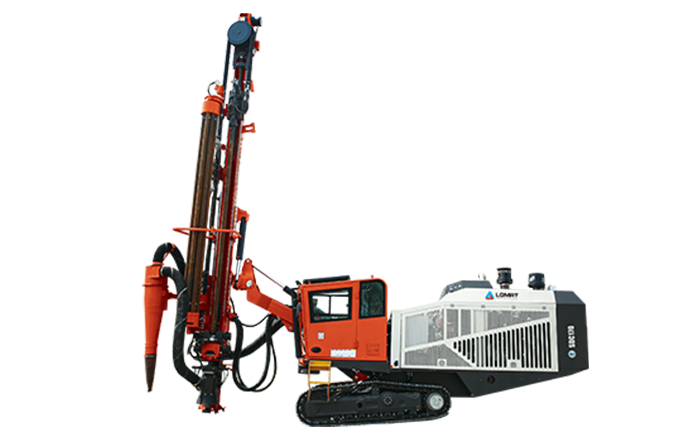
Down-the-hole Drilling Tools operate under high impact energy, pressure, heat, dust, and vibration. Among all operating factors, compressed air quality and lubrication practices have a direct effect on hammer wear, drilling efficiency, maintenance frequency, and total cost per meter.
This guide explains how to protect a DTH hammer from contamination, inadequate lubrication, overheating, corrosion, and incorrect operating conditions. It also provides a step-by-step maintenance procedure, a purchasing checklist, required tools, and common mistakes to avoid. Haichuang Unite supplies DTH drilling solutions designed to support reliable performance in demanding mining, quarrying, construction, and water well applications.

Why Air Quality Is Critical to DTH Hammer Service Life
Compressed air carries energy and contamination into the hammer
A DTH hammer uses compressed air to drive the piston, transfer impact energy to the bit, cool internal components, and remove cuttings from the hole. The same air stream can also carry water, compressor oil, rust, dust, and metal particles into the hammer.
Contaminated air can damage the piston, cylinder, check valve, air passages, and internal seals. Even a small amount of abrasive material can create scoring on precision surfaces. Once internal clearance increases, the hammer may lose impact energy and consume more air without producing a proportional increase in drilling speed.
Moisture causes corrosion, freezing, and lubricant failure
Compressed air becomes hot during compression and cools as it travels through hoses and drill pipes. This temperature change can create condensation. Water entering the hammer can:
- Wash lubricant away from critical impact surfaces.
- Cause rust on the piston, cylinder, and valve components.
- Freeze in cold conditions and block air passages.
- Promote sludge formation when mixed with compressor oil or dust.
- Reduce the ability of rock drill oil to form a protective film.
Air pressure and volume must match the hammer design
Insufficient pressure can prevent the piston from completing its stroke and may cause weak impact, slow penetration, and unstable operation. Insufficient air volume can produce pressure fluctuations and poor cuttings removal.
Excessive pressure can increase impact stress, heat generation, seal wear, and component fatigue. The correct operating range should always be confirmed from the hammer manufacturer's technical data rather than estimated from compressor capacity alone.
Purchasing teams need measurable air quality requirements
Purchasing managers and drilling contractors usually want more than a general statement such as "use clean air." They need specifications that can be checked during equipment selection and field operation.
- Required working pressure range.
- Required free air delivery from the compressor.
- Maximum acceptable moisture content.
- Recommended filtration level.
- Compatible rock drill oil type and viscosity.
- Expected service interval for filters, lubricators, and wear parts.
- Availability of spare parts and technical support.
- Estimated total cost per drilled meter.
How to Check and Improve Compressed Air Quality
First step: Identify the complete air path
Before changing operating settings, map the air path from the compressor to the hammer. Include the compressor outlet, receiver tank, aftercooler, water separator, filters, lubricator, air hose, swivel, drill pipe, shank adapter, and hammer.
Record the following information:
- Compressor rated pressure and free air delivery.
- Compressor type and lubricant condition.
- Hose diameter and total hose length.
- Number of couplings and bends.
- Filter locations and filter condition.
- Water separator drain condition.
- Lubricator location and adjustment setting.
- Pressure measured at the compressor and near the drill rig.
Second step: Drain water from the system
Drain the compressor receiver, air treatment equipment, and low points in the air line before each shift. Water should not be allowed to accumulate in the receiver tank or in horizontal sections of piping.
- Stop the compressor according to the manufacturer's procedure.
- Release pressure only through the approved drain point.
- Open the receiver tank drain slowly.
- Drain the water separator and filter bowls.
- Inspect the drained material for rust, oil sludge, or metal particles.
- Close all drains securely before restarting the system.
If a large quantity of water is found repeatedly, inspect the aftercooler, automatic drains, air line slope, and ambient operating conditions. Frequent water accumulation usually indicates a system problem rather than a normal maintenance condition.
Third step: Inspect and replace air filters
Air filters should be checked at the beginning of every shift and replaced when damaged, blocked, or beyond the manufacturer's service interval. A blocked filter restricts air volume, while a damaged filter allows abrasive particles to enter the hammer.
- Check the filter housing for cracks and loose covers.
- Inspect the sealing gasket for deformation.
- Look for dust bypass around the filter element.
- Check the pressure drop across the filter if a gauge is available.
- Replace wet, collapsed, oil-soaked, or damaged filter elements.
- Do not use compressed air to clean disposable filters unless the manufacturer specifically permits it.
Fourth step: Check air pressure and flow under load
Measure air pressure while the hammer is operating, not only when the compressor is running without load. Static pressure can appear acceptable while the pressure at the hammer drops significantly during drilling.
- Install a calibrated pressure gauge near the hammer inlet or drill rig outlet.
- Record pressure with the hammer stopped.
- Start the hammer and record pressure during normal drilling.
- Compare the readings with the recommended hammer operating range.
- Check for pressure loss across filters, hoses, couplings, and drill pipes.
- Confirm that the compressor maintains the required air volume during continuous operation.
Fifth step: Remove leaks and unnecessary restrictions
Air leaks increase compressor workload and reduce the volume available to the hammer. Inspect hose connections, quick couplings, swivel seals, valve assemblies, and drill pipe joints.
- Listen for hissing when the system is pressurized.
- Apply an approved leak detection solution to suspected joints.
- Replace damaged O-rings and sealing washers.
- Use hoses with an internal diameter suitable for the required air volume.
- Minimize sharp bends and unnecessary hose length.
- Keep couplings clean and fully locked.
How Proper Lubrication Protects the Hammer
Lubrication reduces friction between high-load components
The piston, cylinder, air valve, check valve, and other moving components operate under repeated impact and sliding loads. A continuous film of suitable rock drill oil reduces metal-to-metal contact, removes heat, and helps protect surfaces from corrosion.
Without sufficient lubrication, the hammer may develop scoring, galling, overheating, piston damage, accelerated seal wear, and reduced impact efficiency. The hammer can continue to operate for a short period after lubrication failure, but hidden damage may already be developing.
Use oil made for pneumatic rock drilling equipment
Automotive engine oil, hydraulic oil, gear oil, and general-purpose machine oil may not provide the correct viscosity, tackiness, anti-wear protection, or low-temperature performance for a DTH hammer.
Select oil according to:
- Manufacturer approval for DTH or pneumatic rock drilling equipment.
- Ambient temperature and seasonal conditions.
- Hammer operating temperature.
- Compatibility with seals and internal materials.
- Required biodegradability for environmentally sensitive sites.
- Resistance to water washout and oxidation.
Adjust the lubricator for a continuous oil supply
The lubricator should deliver a consistent oil mist into the compressed air stream. Too little oil causes dry operation and rapid wear. Too much oil wastes lubricant, increases operating cost, contaminates the work area, and may create excessive smoke.
The correct setting depends on the hammer model, air volume, hose length, temperature, drilling angle, and duty cycle. Use the hammer manufacturer's recommendation as the starting point and verify the result through inspection and consumption records.
Use oil consumption as a maintenance indicator
Record the amount of oil added during each shift and compare it with the operating hours or drilled meters. A sudden change can indicate a problem.
- Lower than normal consumption may indicate a blocked lubricator, empty oil line, incorrect adjustment, or frozen oil.
- Higher than normal consumption may indicate a leaking lubricator, excessive setting, damaged line, or abnormal air flow.
- Dark or metallic oil may indicate internal wear or contamination.
- Milky oil may indicate water contamination.
Step-by-Step DTH Hammer Air and Lubrication Service Procedure
Required tools and materials
- Calibrated pressure gauge suitable for the operating pressure.
- Air flow meter or compressor performance data.
- Approved DTH rock drill oil.
- Clean oil container with a sealed lid.
- Oil-resistant gloves and safety glasses.
- Clean lint-free cloths.
- Filter inspection light.
- Leak detection solution.
- Correct replacement air filters and O-rings.
- Basic spanners and coupling tools.
- Torque wrench for components requiring specified torque.
- Cleaning solvent approved for hammer components.
- Maintenance log or digital inspection form.
- Manufacturer service manual and parts diagram.
First step: Isolate and depressurize the equipment
Park the drill rig on stable ground, stop rotation and feed, shut down the compressor, and isolate the air supply. Release stored pressure before disconnecting any hose, coupling, lubricator, or hammer component.
Never inspect a pressurized connection by hand. High-pressure air can inject debris into skin or cause uncontrolled hose movement.
Second step: Inspect the compressor and air treatment equipment
- Check the compressor oil level and general condition.
- Inspect the receiver tank drain.
- Confirm that the aftercooler is clean and functional.
- Drain accumulated water.
- Check filters and separators for blockage.
- Inspect automatic drains for correct operation.
- Confirm that pressure gauges are readable and undamaged.
Third step: Inspect the lubricator
- Verify that the lubricator contains the correct rock drill oil.
- Check the oil level before starting the shift.
- Inspect the bowl and fittings for cracks or leaks.
- Check the oil line for kinks, blockage, or loose connections.
- Confirm that the oil flow adjustment is close to the recommended setting.
- Clean the sight glass so oil flow can be observed.
Fourth step: Confirm air pressure and oil delivery
- Start the compressor and allow pressure to stabilize.
- Measure pressure at the compressor outlet.
- Measure pressure near the hammer inlet if possible.
- Start the hammer under safe, unloaded conditions.
- Observe whether the pressure remains stable during operation.
- Confirm that oil is entering the air stream at a steady rate.
- Record the pressure, temperature, and oil setting in the maintenance log.
Fifth step: Inspect the hammer before installation
Before connecting the hammer, inspect the shank, threaded connections, air inlet, check valve area, and external body. Remove dirt from all connection surfaces. Do not allow metal chips, sand, or cloth fibers to enter the air passage.
- Check the shank for abnormal mushrooming or cracking.
- Inspect threads for galling, deformation, and excessive wear.
- Check O-rings for cuts, flattening, or swelling.
- Confirm that the bit is compatible with the hammer.
- Verify that the air passage is open.
- Apply only the specified assembly lubricant to threaded connections.
Sixth step: Run a controlled test
- Connect the hammer to the drill string securely.
- Start air flow at low pressure.
- Check for external air leaks.
- Increase pressure gradually to the normal operating range.
- Run the hammer briefly without excessive feed force.
- Listen for irregular impact, rattling, or valve noise.
- Stop the hammer if abnormal noise, smoke, or excessive vibration occurs.
Seventh step: Monitor during drilling
During drilling, monitor penetration rate, air pressure, oil consumption, exhaust appearance, temperature, vibration, and cuttings removal. These indicators provide early warning before a major failure occurs.
- A gradual reduction in penetration may indicate wear or insufficient air volume.
- Sudden pressure fluctuation may indicate a restriction, leak, or valve problem.
- Excessive smoke may indicate too much oil or abnormal overheating.
- Dry-looking exhaust may indicate inadequate lubrication.
- Wet cuttings or water discharge may indicate moisture entering the system.
- Metal particles in exhaust or drained oil may indicate internal damage.
Eighth step: Flush and protect the hammer after operation
After drilling, continue clean, dry air flow for a short period if permitted by the hammer manufacturer. This helps remove moisture and loose contamination from internal passages. In cold or humid conditions, follow the manufacturer's storage procedure and use approved rust protection.
- Stop drilling and retract the hammer safely.
- Allow air to flow long enough to clear loose moisture and cuttings.
- Shut down the air supply and depressurize the equipment.
- Clean external surfaces and connection threads.
- Cap the hammer and air hose ends.
- Store the hammer in a dry, protected location.
- Record any abnormal condition for the next inspection.
How to Diagnose Air and Lubrication Problems
Symptom: Reduced penetration rate
Reduced penetration can be caused by worn impact components, insufficient air pressure, inadequate air volume, blocked exhaust passages, poor lubrication, incorrect feed force, or an unsuitable bit.
- Check actual pressure while the hammer is operating.
- Check the compressor air volume and pressure stability.
- Inspect filters, hoses, and couplings for restrictions.
- Confirm continuous oil delivery.
- Inspect the bit and hammer for wear.
- Compare current performance with previous drilling records.
Symptom: Excessive oil consumption
Excessive oil use may result from an incorrectly adjusted lubricator, an air leak through the oil system, excessive air volume, damaged fittings, or an internal hammer condition that increases oil carryover.
- Check the lubricator setting.
- Inspect the oil bowl and connections for leaks.
- Compare actual consumption with the recommended range.
- Check for damaged oil lines.
- Inspect the hammer if oil consumption remains high after adjustment.
Symptom: Hammer overheating
Overheating is commonly associated with insufficient lubrication, excessive operating pressure, inadequate air flow, blocked passages, excessive feed force, or continuous operation beyond the hammer's duty capability.
- Stop the hammer and allow it to cool safely.
- Check oil delivery and oil condition.
- Check pressure and air volume under load.
- Inspect the air path for restrictions.
- Reduce excessive feed force.
- Disassemble and inspect the hammer if overheating returns.
Symptom: Water or rust from the exhaust
Water or rust indicates poor moisture control, inadequate drainage, damaged air treatment equipment, or storage exposure. Continuing operation without correction can quickly damage precision components.
- Drain the receiver and separators.
- Inspect the aftercooler and automatic drains.
- Replace saturated filters.
- Check air lines for low points where water collects.
- Improve storage protection after each shift.
- Inspect internal parts for corrosion before returning the hammer to service.
Maintenance Schedule for Longer Hammer Life
Checks before every shift
- Drain water from the compressor and separator.
- Check oil level and oil type.
- Inspect air hoses and couplings.
- Check for visible leaks.
- Confirm pressure and lubricator settings.
- Inspect the bit and shank for damage.
Checks during every shift
- Monitor pressure under load.
- Observe oil flow through the lubricator sight glass.
- Record oil consumption.
- Monitor penetration rate and vibration.
- Check exhaust for unusual moisture, smoke, or metal particles.
- Stop and investigate abnormal sounds.
Weekly checks
- Inspect and clean filter housings.
- Check hose interiors and coupling seals.
- Inspect the lubricator oil line.
- Review pressure and oil consumption records.
- Check threaded connections and external hammer condition.
- Inspect the drill string for excessive wear or contamination.
Periodic overhaul checks
The overhaul interval should be based on operating hours, drilled meters, rock conditions, impact pressure, contamination level, and the manufacturer's recommendations.
- Measure piston and cylinder wear.
- Inspect impact surfaces for scoring and cracks.
- Check valve components and air passages.
- Replace damaged seals and worn O-rings.
- Measure critical clearances against service limits.
- Clean all parts before reassembly.
- Use the specified torque for threaded components.
- Record replaced parts and measured dimensions.
Common Lubrication and Air Quality Mistakes to Avoid
Using the wrong oil
Do not mix different oils unless compatibility has been confirmed. Mixing products can change viscosity, reduce film strength, damage seals, or create deposits in the lubricator and hammer.
Running the hammer with an empty lubricator
An empty lubricator can cause rapid dry wear. Operators should check the oil level before every shift and inspect the oil line whenever oil consumption changes unexpectedly.
Setting the lubricator by guesswork
Too little oil is not always visible immediately, and too much oil does not necessarily improve protection. Use the recommended setting, measure consumption, and adjust only after evaluating pressure, temperature, and operating conditions.
Ignoring water in the receiver tank
Water left in the compressor system can travel directly to the hammer. Daily draining is a basic requirement, especially in humid environments, during rainy seasons, and when drilling at high altitude or in cold weather.
Using undersized hoses and couplings
Small hoses and restrictive couplings can cause pressure loss and reduce air volume. The system should be sized for the hammer's actual air demand, not only for the compressor outlet connection.
Operating at excessive pressure
Higher pressure does not automatically mean higher productivity. Excessive pressure can increase wear, heat, vibration, and component stress. Operate within the recommended range and verify performance through measured drilling results.
Installing dirty components
Dirt introduced during hammer assembly can score internal surfaces and block air passages. Clean the work area, cap open connections, and use lint-free materials during maintenance.
Failing to document maintenance
Without records, it is difficult to identify whether a failure was caused by air quality, lubrication, operating pressure, rock conditions, or component wear. Record pressure, oil consumption, drilled meters, service dates, and replaced parts.
Purchasing Checklist for Reliable DTH Hammer Operation
Confirm technical compatibility
- Match the hammer to the required hole diameter.
- Confirm shank type and drill pipe compatibility.
- Check the required operating pressure.
- Check compressor free air delivery.
- Confirm bit compatibility and button configuration.
- Review recommended lubrication products.
- Check operating temperature limits.
Evaluate total cost instead of purchase price alone
A low purchase price may be outweighed by short service life, slow penetration, frequent repairs, high oil consumption, and difficult spare parts supply. Purchasing teams should compare the complete operating cost.
- Hammer purchase price.
- Expected service life.
- Replacement piston and cylinder cost.
- Bit consumption.
- Lubricant consumption.
- Compressor fuel or electricity cost.
- Maintenance labor.
- Downtime caused by failures.
- Technical support and delivery time for spare parts.
- Cost per drilled meter.
Ask suppliers for service and operating information
Before purchasing, request technical documents and field support information. A dependable supplier should be able to provide operating pressure ranges, recommended air volume, lubricant requirements, maintenance procedures, wear limits, parts diagrams, and troubleshooting guidance.
Haichuang Unite can help users select compatible Down-the-hole Drilling Tools according to formation, hole diameter, compressor capacity, drilling method, and operating environment. Proper equipment matching is the first step toward stable performance and predictable service life.
Final Operating Rules for Maximum DTH Hammer Service Life
Use clean, dry, correctly pressurized air
Air quality should be treated as part of the hammer maintenance system. Drain water, maintain filters, eliminate leaks, measure pressure under load, and keep the air path free from dust and rust.
Maintain a continuous supply of suitable rock drill oil
Use the correct oil, keep the lubricator filled, monitor consumption, and adjust delivery according to the hammer manufacturer's recommendations and actual field conditions.
Use inspection data to prevent failures
Track penetration rate, air pressure, oil consumption, temperature, vibration, and drilled meters. Small changes in these values often appear before a major component failure.
Choose Down-the-hole Drilling Tools according to the complete system
A DTH hammer does not operate independently. Hammer design, bit selection, compressor capacity, air treatment, lubrication, drill pipe condition, feed force, and rock formation must work together. With correct air quality control, disciplined lubrication, and regular inspection, Down-the-hole Drilling Tools can deliver longer service life, lower downtime, and a lower cost per drilled meter. Haichuang Unite provides equipment and technical support for drilling operations that require dependable performance in demanding conditions.